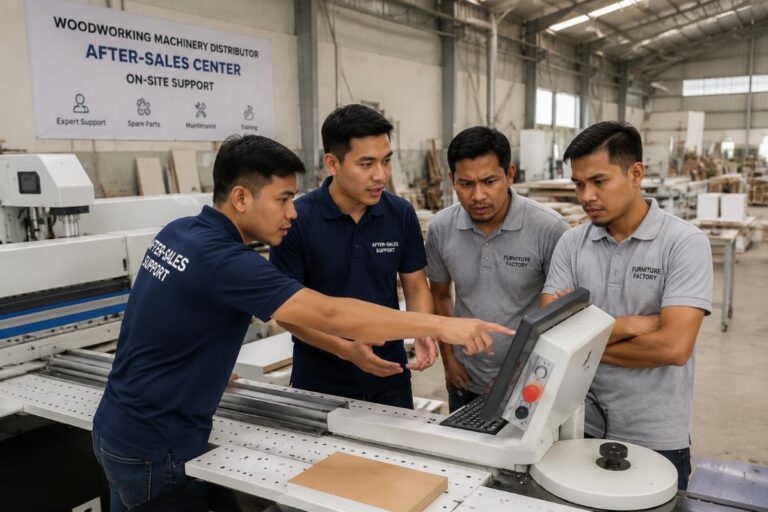
Edge Bander Corner Rounding Setup | OEM Manufacturer for Sale
Most corner rounding defects are not caused by the rounding unit itself — they originate from misalignment between pre-milling depth and trimming knife coordination.
Proper edge bander corner rounding setup requires synchronizing pre-milling cutter depth, trimming knife stroke position, and pressing roller pressure as a unified system, rather than adjusting the rounding station in isolation. When these three parameters are balanced, melamine and PVC edges produce consistent, burr-free R-corners across the entire panel length.
I remember standing inside a cabinet factory in Lagos during a production line commissioning. The newly installed automatic edge bander was producing visible burrs at every corner. The local maintenance team kept swapping trimming knives, convinced the blades were dull. After two days of trial and error, the factory manager was ready to file a complaint. I asked them to stop changing knives and instead check the gap between the pre-milling unit and the first trimming station. The pre-milling cutter was removing too much material, leaving insufficient edge band overhang for the trimming knife to form a clean radius. Once we reduced the pre-milling depth and repositioned the trimming knife stroke, the corners came out smooth within a single shift. This pattern repeats across installations in West Africa and Southeast Asia — the rounding unit gets blamed for problems that actually begin upstream. [NEED_CITE: edge banding defect root cause analysis per woodworking machinery maintenance standards]
Getting corner rounding right is never about one single adjustment. It is about understanding how each station in the edge banding sequence affects the next. Let me walk through the setup logic step by step.
What Causes Poor Corner Rounding on an Edge Bander?
Poor R-corner quality almost always traces back to process sequence mismatch, not rounding knife wear.
The edge banding process follows a fixed sequence: pre-milling, gluing, pressing, end trimming, flush trimming, and finally corner rounding. Each station removes or shapes material in a specific way. When the pre-milling cutter leaves the panel edge with an inconsistent profile, the edge band sits at an uneven height relative to the panel surface. The trimming knife then cannot form a uniform radius because the material volume it encounters varies along the panel length. [NEED_CITE: sequential process dependency in automated edge banding systems]
In a workshop in Addis Ababa, I observed semi-automatic edge banders producing R-corners that alternated between sharp and overly rounded within the same batch. The operator assumed the rounding motor speed was the issue. The real cause was the pressing roller pressure — it was set too high for the board thickness tolerance, causing the edge band to shift slightly during the pressing phase. By the time the panel reached the rounding station, the edge band position had drifted, and the knife could not track a consistent path.
Common root causes include:
- Pre-milling cutter depth set too aggressive, removing material that the trimming knife needs to form the radius
- Trimming knife stroke not matching the edge band thickness
- Pressing roller pressure uneven across the panel width
- Feed speed fluctuation caused by unstable power supply, disrupting the synchronization between stations
-刀具安装角度偏差超出容差范围
The key insight is that corner rounding is the final expression of everything that happened before it. If upstream stations are misaligned, no amount of adjustment at the rounding unit will fix the problem.
How to Align Pre-Milling and Trimming for Clean R-Corners?
Pre-milling depth and trimming knife position must be matched to the board thickness and edge band thickness as a paired setting.
The pre-milling unit prepares the panel edge by removing a thin layer of material to ensure a clean, square surface for the edge band to adhere to. If the pre-milling cutter removes too much, the edge band sits recessed below the panel surface, and the trimming knife cannot reach enough material to form a full radius. If the pre-milling cutter removes too little, the edge band protrudes excessively, and the trimming knife has to work harder, leading to inconsistent corner shapes and accelerated knife wear. [NEED_CITE: pre-milling depth optimization for edge band adhesion and trimming coordination]
The adjustment sequence works as follows:
- Measure the actual board thickness using a micrometer at multiple points along the panel. Board thickness tolerance varies by supplier and batch — never assume the nominal thickness is accurate.
- Set the pre-milling cutter depth to remove a minimal, consistent layer. The goal is surface cleanup, not significant material removal.
- Install the edge band and run a test panel through the gluing and pressing stations.
- At the trimming station, check the edge band overhang — the amount of edge band material extending beyond the panel surface. This overhang is what the trimming knife uses to form the R-corner.
- Adjust the trimming knife stroke so that it contacts the edge band at the correct height to produce the desired radius. The stroke position must match the edge band thickness.
- Run a test panel and inspect the corner under magnification. The radius should be uniform, with no flat spots, burrs, or visible transition lines.
In a door manufacturing facility in the Middle East, we encountered severe corner chipping when processing thick composite panels with PVC edge band. The pre-milling cutter was set to a deep cut, which worked fine for standard board thickness but caused the edge band to sit too low on the thicker panels. By reducing the pre-milling depth and compensating with a slight increase in trimming knife pressure, we eliminated the chipping without changing the knife or the edge band material.
| Board Thickness Category | Pre-Milling Depth Setting | Trimming Knife Stroke Position | Pressing Roller Pressure |
|---|---|---|---|
| Thin boards with narrow tolerance | Minimal | Centered on edge band thickness | Standard |
| Thick boards with wide tolerance | Reduced | Adjusted upward | Increased slightly |
| Inconsistent batch thickness | Minimal and verified per batch | Verified per batch | Adjusted per batch |
How to Adjust Trimming Knife Stroke and Pressure?
Trimming knife stroke determines the R-corner geometry, while knife pressure controls surface finish — both must be adjusted together.
The trimming knife in the corner rounding unit follows a programmed or mechanically guided path to shape the edge band into a rounded profile. The stroke defines how far the knife travels into the edge band material. If the stroke is too short, the knife does not reach the full radius, leaving a flat or incomplete corner. If the stroke is too long, the knife cuts into the panel substrate, damaging the edge and creating a visible defect. [NEED_CITE: trimming knife stroke adjustment methodology for R-corner formation]
The pressure applied by the trimming knife affects how cleanly it cuts through the edge band material. Too little pressure results in tearing or incomplete cuts, especially with softer PVC materials. Too much pressure causes the knife to deflect, producing uneven radii and accelerating knife wear.
The adjustment process involves:
- Set the trimming knife stroke to the midpoint of its adjustment range.
- Run a test panel and measure the resulting R-corner radius using a radius gauge.
- If the radius is incomplete, increase the stroke incrementally until the full radius is achieved.
- Once the stroke is set, adjust the knife pressure. Start with moderate pressure and increase gradually until the cut is clean without visible tearing.
- Inspect the corner surface. If there are visible marks or roughness, reduce the pressure slightly. If the cut is incomplete or torn, increase the pressure.
- Verify the adjustment by running multiple test panels. The R-corner should be consistent across all panels.
Different edge band materials respond differently to stroke and pressure settings. PVC is softer and more forgiving, requiring less pressure but precise stroke control to avoid tearing. ABS is more rigid and requires higher pressure for a clean cut. Acrylic is brittle and demands very precise stroke and pressure balance to prevent chipping or cracking.
A furniture factory in Southeast Asia upgraded from manual edge banding to a fully automatic line and immediately encountered inconsistent R-corners. The operator had set the trimming knife pressure to maximum, assuming more pressure would produce a better finish. In reality, the excessive pressure was causing the knife to deflect, producing corners that varied from panel to panel. Once we reduced the pressure to a moderate level and fine-tuned the stroke, the consistency improved dramatically.
What Material-Specific Settings Should You Use?
Edge band material type dictates trimming speed, knife pressure, and feed rate — a single setting does not work for all materials.
PVC, ABS, acrylic, and melamine edge bands have different hardness, flexibility, and thermal properties. These differences mean that the trimming knife must interact with each material in a specific way to produce a clean R-corner. Using the same settings for all materials leads to poor results — tearing on PVC, chipping on acrylic, or incomplete cuts on ABS. [NEED_CITE: edge band material properties and their effect on trimming parameters]
For PVC edge bands, which are relatively soft and flexible:
- Trimming knife speed should be moderate to avoid melting or tearing the material
- Knife pressure should be light to moderate to prevent deflection
- Feed rate can be higher, as PVC cuts easily
For ABS edge bands, which are more rigid and durable:
- Trimming knife speed should be higher to ensure a clean cut through the harder material
- Knife pressure should be moderate to high to maintain cutting consistency
- Feed rate should be moderate to allow the knife to engage fully
For acrylic edge bands, which are brittle and prone to chipping:
- Trimming knife speed should be carefully controlled to avoid generating excessive heat or stress
- Knife pressure should be precise — too much causes chipping, too little causes tearing
- Feed rate should be slower to allow the knife to form the radius without shocking the material
Modern edge banders with programmable logic controllers allow operators to save material-specific parameter sets. This means that when switching from PVC to acrylic, the operator can load the preset parameters rather than manually adjusting each setting. This reduces setup time and eliminates human error.
How to Troubleshoot Voltage and Feed Speed Issues?
Unstable power supply causes feed speed fluctuation, which directly disrupts the synchronization between edge banding stations and destroys corner rounding consistency.
In many regions across Africa, Southeast Asia, and Latin America, the electrical grid experiences frequent voltage drops, surges, and phase imbalances. These power quality issues affect the feed motor that drives panels through the edge bander. When the feed speed fluctuates, the timing between stations becomes inconsistent. The pre-milling cutter may remove more or less material depending on the instantaneous speed, the pressing rollers may apply uneven pressure, and the trimming knife may engage the edge band at the wrong moment. The result is R-corners that vary from panel to panel, even when all mechanical settings are correct. [NEED_CITE: impact of power quality on automated woodworking machinery performance]
I worked with a panel furniture factory in Nigeria where the edge bander was producing acceptable R-corners in the morning but deteriorating throughout the day. The maintenance team checked every mechanical adjustment, replaced knives, and even recalibrated the controllers. Nothing worked consistently. When I asked about the power supply, they mentioned that the factory shared a transformer with neighboring workshops, and voltage dropped significantly during peak hours. The feed motor was slowing down as the voltage dropped, causing the panel to move through the machine at varying speeds.
The solution involved installing a voltage stabilizer to ensure consistent power delivery to the feed motor. Once the voltage was stabilized, the feed speed remained constant, and the R-corner consistency returned to acceptable levels.
Modern edge banders designed for export markets often include wide voltage adaptation capabilities, allowing them to operate reliably across a range of input voltages without external stabilizers. Variable frequency drives on the feed motor can also compensate for minor voltage fluctuations by maintaining consistent motor speed regardless of input voltage variations.
When troubleshooting corner rounding inconsistency, always check the power supply first. Measure the voltage at the machine input during operation. If it fluctuates beyond the manufacturer’s specified tolerance, install a stabilizer or upgrade the electrical infrastructure before adjusting any mechanical settings.
Conclusion
Corner rounding quality is a system-level result, not a single-station adjustment.
Proper edge bander corner rounding setup requires understanding the interdependence of pre-milling depth, trimming knife stroke, pressing roller pressure, and feed speed consistency. When these parameters are balanced and matched to the specific board thickness and edge band material, the result is clean, burr-free R-corners across every panel. Power quality and feed speed stability are often overlooked but critical factors, especially in regions with unstable electrical grids. By approaching corner rounding as a coordinated system rather than an isolated station, maintenance technicians can eliminate the majority of R-corner defects and achieve consistent production quality.